

These are so great to have for long
car rides! I am saving these for the next time
we take the 3 1/2 hour trip to visit Grandpa and Grandma :) They are very
simple and you can get creative with what you choose to put in them! They are a
great low-budget craft, so get your glue gun ready and lets get started...

First you will need to find a clear plastic container. I used empty vitamin containers (we weren't quite finished with all the vitamins so I put them into Rubbermaid containers with good sealing lids). Clean the containers well and remove the labels; I had to use more than just soap and water to get the labels off, and Goo Gone helped take them off and removed any sticky residue that remained.

Next go search around your house for small objects you can hide in your bottle. Everyday things like paperclips, safety pins, coins, little items out of the quarter machines, paper flowers, and other things work great. If you would like to get a little more creative with this part, you could do different themed bottles with different kinds of dinosaurs, or different colored buttons or whatever you get excited about :) I put about 25 different items to search for per bottle and threw a few other things in them just for fun!

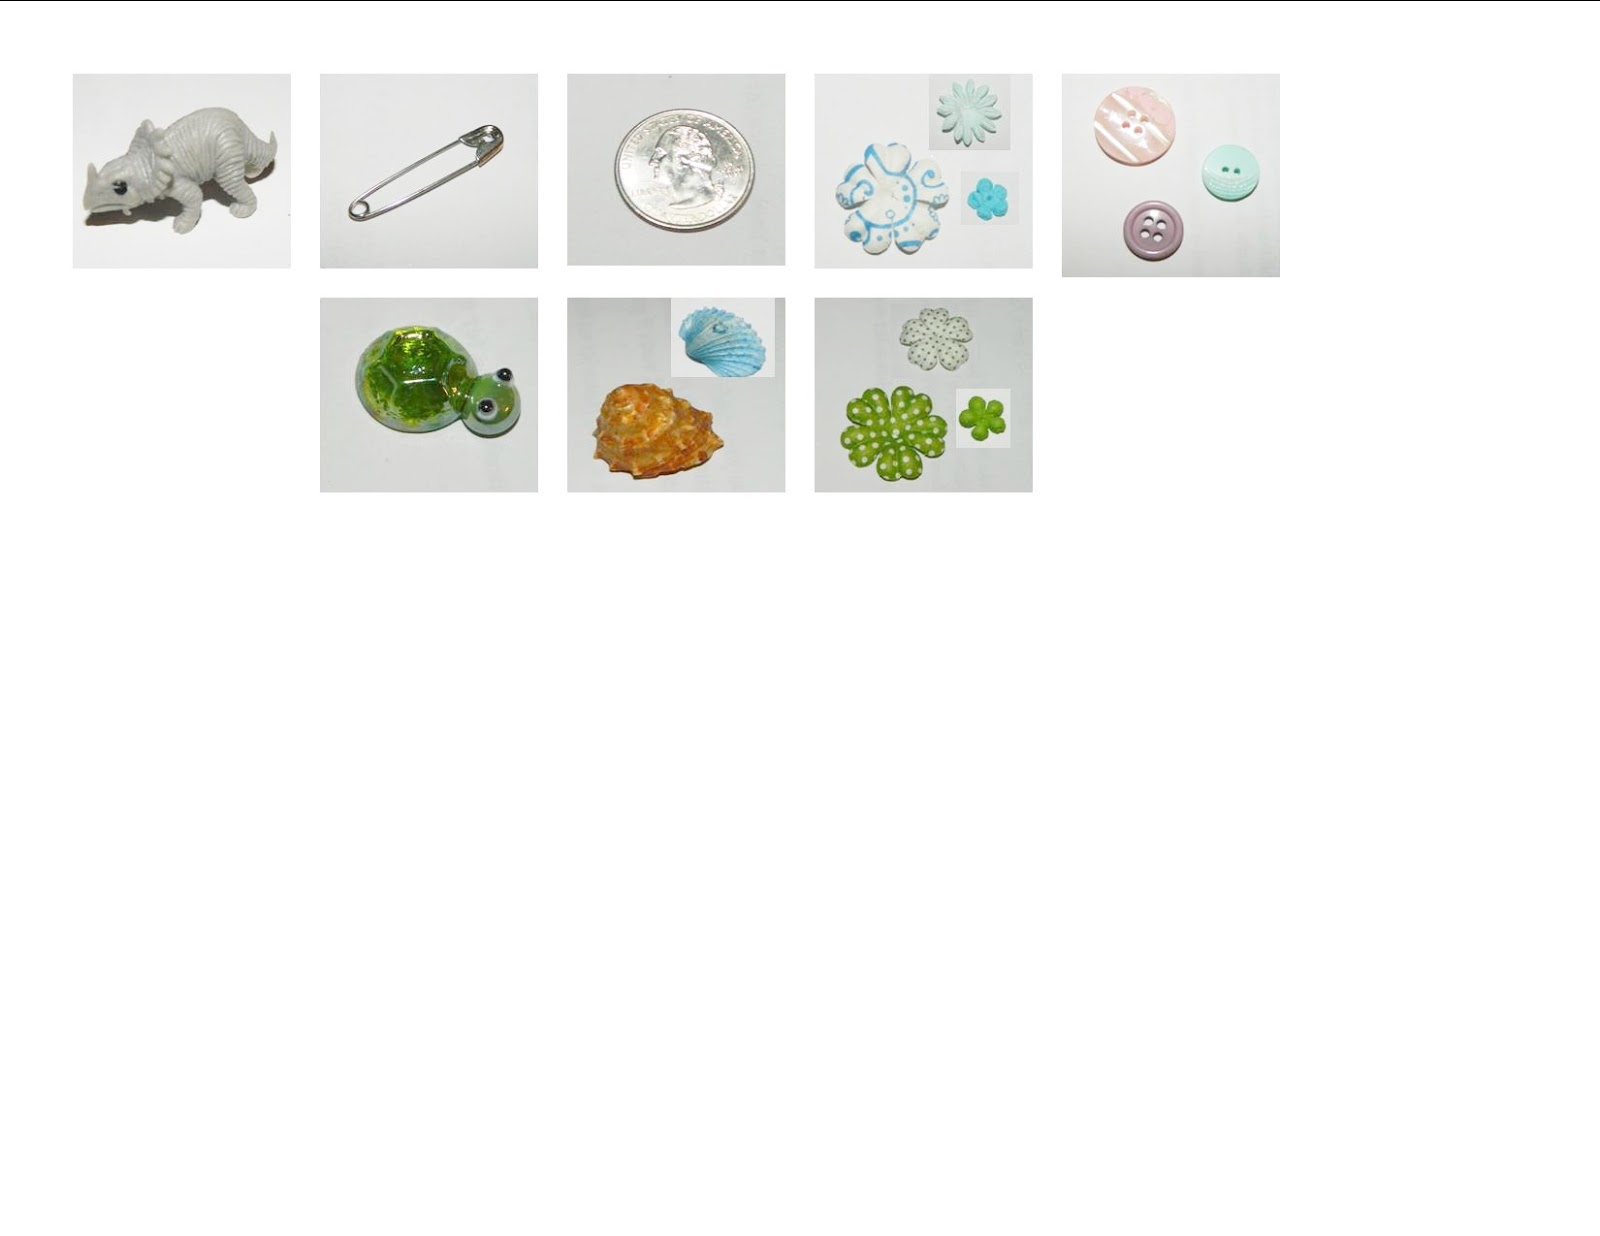
After that, get a blank white piece of paper and your camera. Take close up
pictur
es of each item. If you are doing a couple buttons or flowers you can put
them in the same picture so your kids can see the differences in size or color.
After I finished taking all of the pictures I
moved them into a publisher document, cropped them if needed and re-sized them.
If you are using the same objects as I did you
can print the pictures below and skip this step. I also added labels to each of
the small squares titling the items.


Almost done now! Punch holes in the corners of the picture squares and put them
on a key ring. Attach the key ring to the neck of your plastic jar/container
with a piece of ribbon. Begin by alternatively filling your jar with rainbow
rice and your "search and find" items. (If you missed the post on how
to make Rainbow Rice, check it out). Make sure to leave a little
bit of room at the top of the jar so that the rice will be able to move when
the jar is turned or shaken (you can test your jar before sealing it to see if
you want to add more or remove some).


Finally, put some hot glue around the rim of the jar and twist the cover on
tight. You have finished a fun new toy that will hopefully impress and
entertain your kiddos for endless car trips!
No comments:
Post a Comment