Saturday, March 30, 2013

Kiwi Pops

As the weather grows warmer and we begin to shed some of the many layers we have adorned this winter. I begin to dream about playing in the sun, going swimming and making home-made popsicles!
 

These are so easy and so yummy! I am not a huge fan of kiwi because of all the seeds, but I absolutely love these popsicles in the summer!
 
So basically you will need:
 
Popsicle sticks
Kiwi
Chocolate almond bark
Waxed paper
 
 
Remove the skin from the kiwi and slice them in half.
 
Lay them on a pan covered with waxed paper (if the kiwi you use are very soft you may need to place them in the freezer for a bit before covering them with chocolate).
 
 
Next, heat up your chocolate (according to package directions) and dip each popsicle in the almond bark to coat them. Place them back on the waxed paper covered pan and put them in the freezer to set. (Sorry I don't have a picture of the finished product)
 
Enjoy!!

Tuesday, March 26, 2013

Easter Tree


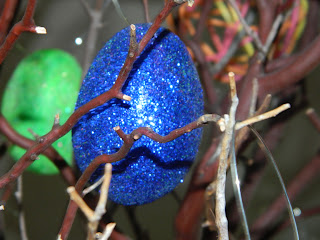
We love to put a little something seasonal up on the table and this Easter Tree was so much fun to decorate with the boys! Just beware that when you use glitter and you have little people around there is no containing it :)
 
 
First you will need some:
 
Yarn
Glue
Water Balloons
Plastic Eggs
Glitter
String or Wire for hanging them
A branch from your backyard


To make the Yarn Orb/Eggs: Blow up the water balloons to the desired size and tie them. Pour some glue in a bowl and add a little bit of water and stir in up until it is an easily stirrable consistency. Put some yarn away from the spool and send the yarn through the glue ( make sure to run the yarn between your fingers to remove excess glue - this step does get a little messy) before going onto the balloon. Wrap in around in no particular fashion until you like how full it is. Then allow the yarn-balloons to dry on top of glasses (make sure to turn them after a few hours so the underside can dry too. Its take a good 24 hours for them to fully dry.
 

To Make the Glitter Eggs: Smear the plastic eggs with glue and roll/sprinkle with glitter! So easy and so cute!
 

Add string or Wire to your eggs and hang them on your tree! I also borrowed the stuffed sheep from the boys room and a picture frame where I make sure the true reason for Easter is displayed!
 

Hope you enjoy this simple and fun project with your kids!
 

Monday, March 18, 2013

Look and Find Bottles

 
These are so great to have for long car rides! I am saving these for the next time we take the 3 1/2 hour trip to visit Grandpa and Grandma :) They are very simple and you can get creative with what you choose to put in them! They are a great low-budget craft, so get your glue gun ready and lets get started...


First you will need to find a clear plastic container. I used empty vitamin containers (we weren't quite finished with all the vitamins so I put them into Rubbermaid containers with good sealing lids). Clean the containers well and remove the labels; I had to use more than just soap and water to get the labels off, and Goo Gone helped take them off and removed any sticky residue that remained.


Next go search around your house for small objects you can hide in your bottle. Everyday things like paperclips, safety pins, coins, little items out of the quarter machines, paper flowers, and other things work great. If you would like to get a little more creative with this part, you could do different themed bottles with different kinds of dinosaurs, or different colored buttons or whatever you get excited about :) I put about 25 different items to search for per bottle and threw a few other things in them just for fun!


After that, get a blank white piece of paper and your camera. Take close up pictur
es of each item. If you are doing a couple buttons or flowers you can put them in the same picture so your kids can see the differences in size or color. After I finished taking all of the pictures I moved them into a publisher document, cropped them if needed and re-sized them. If you are using the same objects as I did you can print the pictures below and skip this step. I also added labels to each of the small squares titling the items.
 

Now you will need to laminate the small pictures. I cut each one to the same size square and put them back to back. I made sure to leave plenty of room between each square to have a nice little laminated boarder. (I got my small Scotch laminator at Joann Fabrics when a 50% off coupon and I continue to go back there with coupons to get laminating sheets when I run out). Allow the laminated sheets to cool when they come out  because they will be very hot! (If you do not have your own laminator and do not want to purchase one, you can take your squares to any office store or print shop and have them done for you.)


Almost done now! Punch holes in the corners of the picture squares and put them on a key ring. Attach the key ring to the neck of your plastic jar/container with a piece of ribbon. Begin by alternatively filling your jar with rainbow rice and your "search and find" items. (If you missed the post on how to make Rainbow Rice, check it out). Make sure to leave a little bit of room at the top of the jar so that the rice will be able to move when the jar is turned or shaken (you can test your jar before sealing it to see if you want to add more or remove some).


Finally, put some hot glue around the rim of the jar and twist the cover on tight. You have finished a fun new toy that will hopefully impress and entertain your kiddos for endless car trips!


Monday, March 11, 2013

Rainbow Rice


This is one of my all time favorite craft/activity!!! Rainbow Rice, it is so much fun to play with especially in the winter when the kiddos can’t be out in the sandbox and it is a wonderful sensory activity because of the different texture. We made this when our first born was 2 years old and he loved it! He loved helping make the rainbow rice and playing in it. He is almost 4 years old now and he still asks to get the bucket out so he can scoop it into piles and drive his tractors through it. I need to admit that it is much less messy now than it used to be. Levi is at an age where he understands that it is much better for the rice to stay in the bucket than throw it all over the floor. (Back in the day when he was 2 it didn’t always stay in the bucket and we would need to get the broom out and sweep it up and dump it back in, but clean up was very easy.)
The other great thing about rainbow rice is that you can make it very inexpensively! I got all of the things I needed for this at the dollar store (except the baking sheets to let it dry on, I already had those in the cupboard).
 
 
What you will need:
 
Rice
Food coloring
 
Rubbing Alcohol
Waxed Paper
Sturdy Ziploc Bags
Baking Sheets
A Shollow Container with a Lid
I also suggest you wear dark or older clothes especially if you plan to have your 2 year old help you dye your rice, just in case there are any spills (food coloring is very tough to get out of clothes and off skin for that matter).
 
For each color I used about  4 cups of rice (1 bag), 2 Tablespoons Rubbing Alcohol and the desired amount of food coloring (if you want it pastel colors use less, if you want darker more vibrant colors use more). Put the Rubbing Alcohol, food coloring and rice in a Ziploc bag and seal it. Now shake it, roll it and squish it until the rice is completely coated with color. The rubbing alcohol smell can be a little strong so just keep that in mind, maybe have your favorite candle going while you do this project (just keep it a safe distance away from where you are working).
Pour the rice out onto cookie sheets covered with waxed paper (this makes clean up super easy). And allow it to dry in the sunlight for a couple hours.
Once it has dried pour it into a short storage container and add some fun toys! Your rainbow rice is ready to be enjoyed by kids of all ages (2 and up). I do want to warn you that little hands will be funny-colored after the first couple times of playing in the rice but it easily washes off with soap and water!
Now a little story that came about after we made rainbow rice for the first time…
Levi was helping me color our rainbow rice and he was so excited to the finished product! He must have taken the time to really soak it all in because a couple days later I had an idea to color some penne noodles to use to make necklaces and bracelets. I thought I would color the pasta while Levi was watching a movie to minimize the mess and time it would take but it didn’t take very long for Levi to follow his nose into the kitchen and ask if I was making more rainbow rice! He was so excited when he smelled the rubbing alcohol! I tried to explain that he wasn’t smelling rainbow rice but rubbing alcohol. Levi’s sense of smell had really been keen that week because a couple days later I had just blown out a candle and the scent of smoke was still lingering…well, Levi walked into the room and told me it smelled like dinner! Just to be fair I hadn’t burned dinner in a very long time – he must have thought daddy was cooking or something :)

Tuesday, March 5, 2013

Quiet Time Felt Books - Part 2


Here are more pages from the quiet time books...(If you missed Part 1 check it out to see what you will need to begin and I hae links to many site that inspired this project.)
 
 
The Refrigerator and Plate:  Cut out a large piece of grey felt for the refrigerator. Sew a line across to divide the freezer and the fridge. I hot glued on the rectangle handles and “FRIDGE” sign.  I used a bowl to trace and make the plate and then a bowl that was a little smaller to draw a line inside the first one to sew a second line around. I used white felt to cut out the silverware. Get creative with your sandwich items; I made lettuce, bread, an egg, cheese, tomato, and  bologna. The place where I was inspired for this page went even further and got some printable felt and made a little tub of butter, I love that idea! (Check it out HERE)
 
 
The Ladybug: Use another bowl to help you cut a circle out for your ladybug. Cut a small half circle for the head and sew it on. You need to find a zipper for your ladybug’s back (I found this itty-bitty one at Joann Fabrics). Cut a slit down the middle of your large circle as long as the zipper of your choice. Sew your zipper into the middle of the slit and sew your ladybug onto the page. I used a sparkle black felt for the ladybugs spots and hot glued the white Velcro onto the ladybug’s back and spots.


The Ducks and Fish: This page was inspired by: The Crafty Chicks. It is pretty much as it looks, I did a little hand-stitching on the sun, large duck and seaweed but other than that is was done on the machine. The backs of the duckies and fish have small snaps so they can come off or spin.

 
The Puppy: There are many different ways to do this page (I really like this puppy page too). I picked a puppy idea I liked off of a Cricut Cartridge and went with that. I found the collar and leash clips at Hobby Lobby. To make the page a little more interactive I also have two options that can be snapped into his little dish. Does this cute puppy want dog food or a bone?


Once you have finished each of the pages you need to lay them back to back and fold the edges in and pin them. You can choose if you would like to finish the page edges with a fancy stitch or a simple one. I went with a straight stitch because a few of my page designs got pretty close to the edges. Sew the 6 pages back to back which will now leave you with 3.


The Cover: Lay the pieces of fabric; I used regular cotton material for these, back to back. If you would like to add the binder like the picture below it will just involve a couple more steps. I will explain how to do this mostly with pictures below….

To make the button flap, take a strip of fabric 12x3 inches and fold it in half the long way with the front sides together. Sew a “U” shape and flip it around so the front is now on the outside. Most sewing machines have a button hole option, use this to sew a button hole onto the middle of the rounded end of your button flap.


Now lay the material you have ready for the cover on top of each other with the front sides out.  (To make the covers a little firmer I also added a piece of the clear tablecloth plastic in between the cotton pieces, one thing to keep in mind is that the plastic does make a little bit of a rustling noise…so the “Quiet Book” cover isn’t so quiet, oops) Insert the button flap into the side where you would like it. Fold with edges in about 1/2inch and pin them. Then sew a seam all the way around, I would suggest you get a little fancy with this stitch. Maybe use a color that will make it stand out a bit more to add some pizzazz to the edge of your cover! Sew On the button and you are finished!!!


Great job!!


Tuesday, February 26, 2013

Quiet Time Felt Books - Part 1


I remember having felt books as a kid and I wanted to share the fun with my boys. These special books have been so helpful at church, in the car, at dentist appointments and almost any other time I needed the boys to be quiet and sit still.
 
I was inspired by so many different blogs for the quiet-time books I made. It is so nice having Pinterest and blogs available to feed our creativity and help us find ideas when we have a project in mind! Many ideas came from: Sweet Mama Duck, Mama Duck again, Fieltrunguis, The Crafting Chicks, Scott & Lonica, The Thornock Family, A Back to Basics Lifestyle, Cathie & Steve, Homemade by Jill has some great templates, you can also get patterns off Etsy if you would like.

I loved making these however they are very time consuming so be prepared…

Step 1: Pick your cover fabric and pages. I made my books with 12 pages in each and that is plenty in my opinion. If you were to do more than that your books will be getting very thick. For the pages you need 6 pieces of flannel cut at 10-inches by 20-inches each. For the cover you will need two pieces at 23-inches by 12-inches.  For the binder and button flap you will need 12-inches by 6-inches, there will be more details on this later.

Step 2: Stock up on felt! I used a lot of the solid colored sheets to accomplish my books (I found a nice pack of assorted felt on Amazon). Now I will go through each page with you…

The Clock: I used two different sized bowls to trace around to make the circles. Then I used a piece of chalk to draw the numbers and cut them out. I laminated two blue arrow for the hands (I thought that laminated arms would spin best on the felt without getting stuck) and used a brad as the fastener.  I sewed the large circles together and hot glued the numbers on.


You will find in this book I also added verses to each page. If you would also like to do this, print the verses you would like to use on each page and laminate them. I then cut out a square opening and sewed the verse underneath.  It is a little tricky because the laminated paper will slide a bit while you sew if you don’t hold it firm enough.

 
The Cupcakes and Oven: This is one of my favorites! Cut a piece of grey felt to look like a cookie sheet and write the numbers 1-9 on it with a permanent marker. The oven can be whatever color you would like it to be. It is comprised of a large rectangle, a pentagon and a skinny rectangle. I used brads for the knobs and small ovals of white felt for the burners. The window of the oven is some clear plastic tablecloth material I got at Joann Fabrics. You will need some little pieces of Velcro to close the oven.
 

 The Cupcakes: I used 3 different kinds of bottoms with all white frosting. I free handed the numbers again (but I have seen many felt stickers at different dollars stores especially Loopy Dollar, and I used some of these on pages to come). I used a sewing machine to make the lines on the bottoms and then I hand-stitched on the frosting with a bright yellow. I used hot glue to attach the numbers and the gems (found a huge bucket of these cute little bling-things at Hobby Lobby).


The Dress-Up Snowman: Cut out a snowman from white felt (I found some sparkle white that was a lot of fun for this page). Sew on the snowman’s arms then his body and nose. I attached some fun sparkle snowflake stickers and his googly eyes with hot glue. Then cut out the snow bank and sew a decorative line across the top. Next put the snow bank on the bottom of your page and sew to attach it on 3 sides, leaving the top open like a pocket to store the dress-up items in.  Have fun making different things for your snowman to wear. I made some mittens, a top-hat, vest, scarf, Santa hat, a broom and candy cane for him to hold and some coal buttons.


Peek-a-boo Page: This one I just looked at this page and tried to copy it I did most of the sewing on the page on the machine. The smile, nose and mittens were done by hand.


Game Page: I used 36 - 1 1/5 inch squares for my game; feel free to layout your game a bit differently. I added hand-stitched fruit to this page to jazz it up a little and sandals as the game pieces. (I found a package of felt sandals at Hobby Lobby and used them on another page to come too) I added some of the ruff Velcro to the backs of the sandals so they would stick better to the felt. The spinner I got in a game I bought at a thrift store for super cheap.  I hot glued Velcro onto the back of the spinner and sewed some pieces in the page so if you want to remove the spinner from the game, you can. This game works on colors and numbers and has been a popular page with our 3 year old.


Beacuse there are so many pages between the 3 books I have made I will post these in several different parts! Hope you enjoy making these special books for your little ones!